Unlocking advanced personalization in Roblox Studio is a key skill for many gamers who enjoy creating unique experiences for themselves and their friends. This guide will navigate you through the process of how to insert avatar into Roblox Studio, a crucial step for testing animations, creating custom character models, or even setting up engaging cutscenes within your game. With millions of US gamers, many balancing demanding jobs and family lives, finding straightforward solutions to common development tasks like this is incredibly valuable. Roblox Studio continues to evolve, making it easier for creators to bring their visions to life, and understanding avatar insertion is fundamental. We will cover various methods, from using the built-in Avatar Importer to leveraging plugins and custom scripts, ensuring you have the tools to integrate any avatar, whether it is your own, a friend's, or a specific Rthro model, directly into your projects without unnecessary hassle. Get ready to enhance your development workflow and make your game truly stand out.
Top 5 Natural Questions about How to Insert Avatar into Roblox Studio:
Q1: How do I get my own character into Roblox Studio for testing?
Q2: What's the easiest way to load a specific player's avatar into my game?
Q3: Why won't my avatar load properly in Roblox Studio, and how can I fix it?
Q4: Can I use different avatar types (R6, R15) when importing characters?
Q5: How do I use a custom avatar model I made in Blender within Roblox Studio?
7 Additional FAQ-style Questions and Answers:
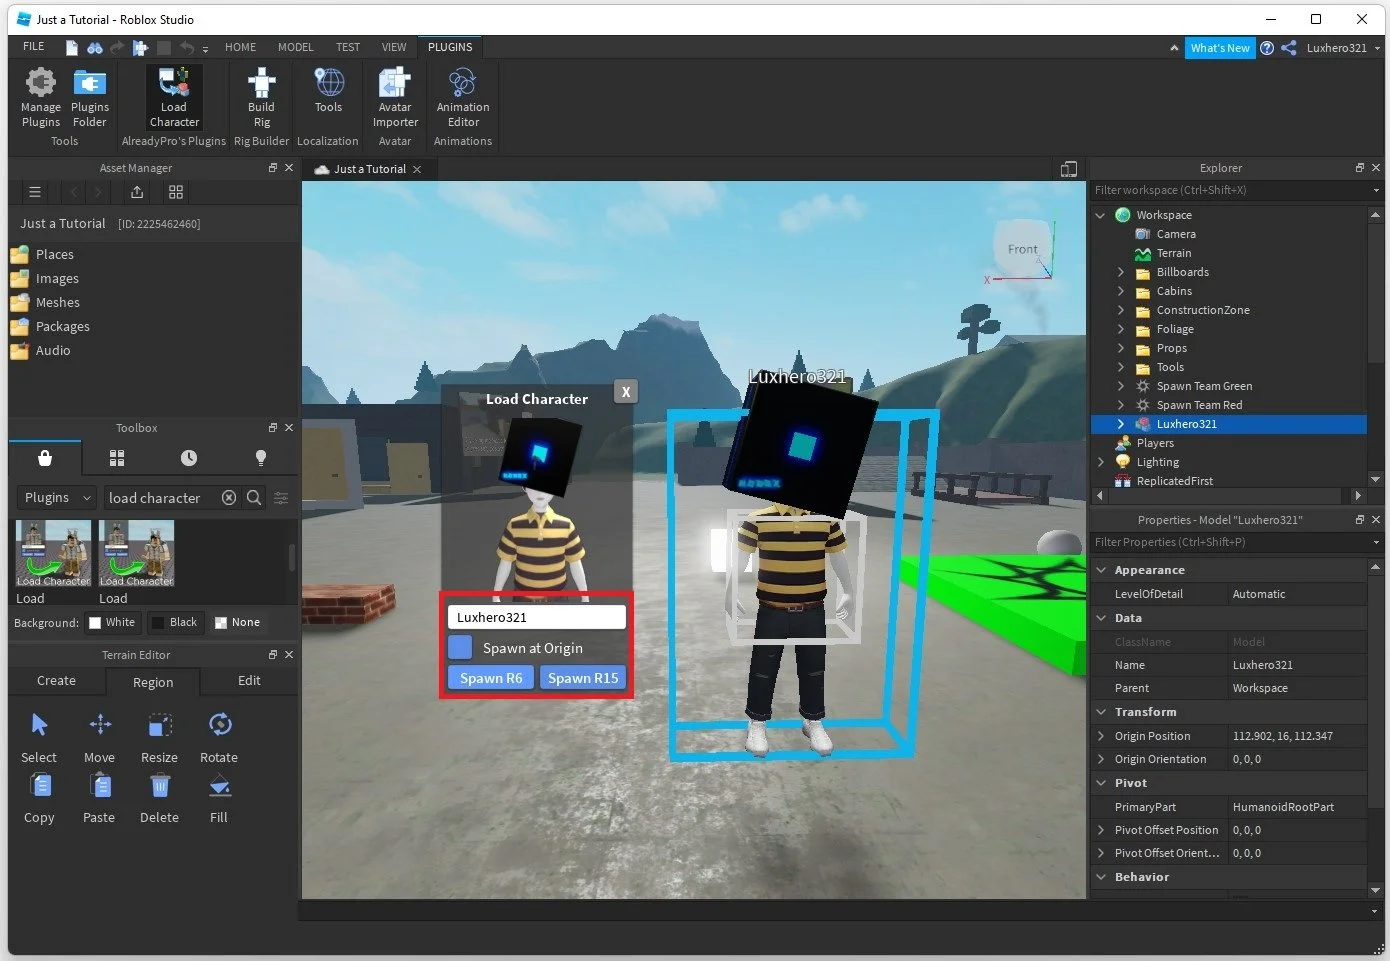
Q: How do I load a character into Roblox Studio using their username?
A: To load a character in Roblox Studio by username, navigate to the 'Plugins' tab and click on a character loading plugin, like 'Load Character Pro'. Enter the desired username, select R6 or R15, and press 'Spawn'. The character model will then appear in your workspace for development and testing purposes.
Q: What's the best way to spawn multiple test avatars quickly in my project?
A: For spawning multiple test avatars efficiently, use a robust character loading plugin. Many plugins allow you to save a list of usernames or provide options to spawn generic R6/R15 characters with a single click. This significantly speeds up testing scenarios requiring various character models.
Q: How can I ensure my game's animations work correctly on both R6 and R15 avatars?
A: To ensure animation compatibility, always test your animations on both R6 and R15 character models. Use the Animation Editor, load your avatar, and play the animation. Pay attention to joint bending and limb movement, adjusting rigs or animation keyframes as needed for both avatar types to function smoothly.
Q: What should I do if my imported avatar looks corrupted or parts are missing?
A: If an imported avatar looks corrupted or has missing parts, first verify the username or User ID. Check your internet connection, then try restarting Roblox Studio. If the problem persists, the issue might be with the specific avatar's assets or an outdated plugin. Try a different avatar or update your Studio.
Q: Can I change an avatar's size or scale after inserting it into Studio?
A: Yes, you can. After inserting an avatar, select its main model in the Explorer window. You can then modify its 'Scale' properties within the Properties window, such as BodyHeightScale, BodyWidthScale, and HeadScale, to adjust its overall size or specific dimensions. This helps test different player proportions.
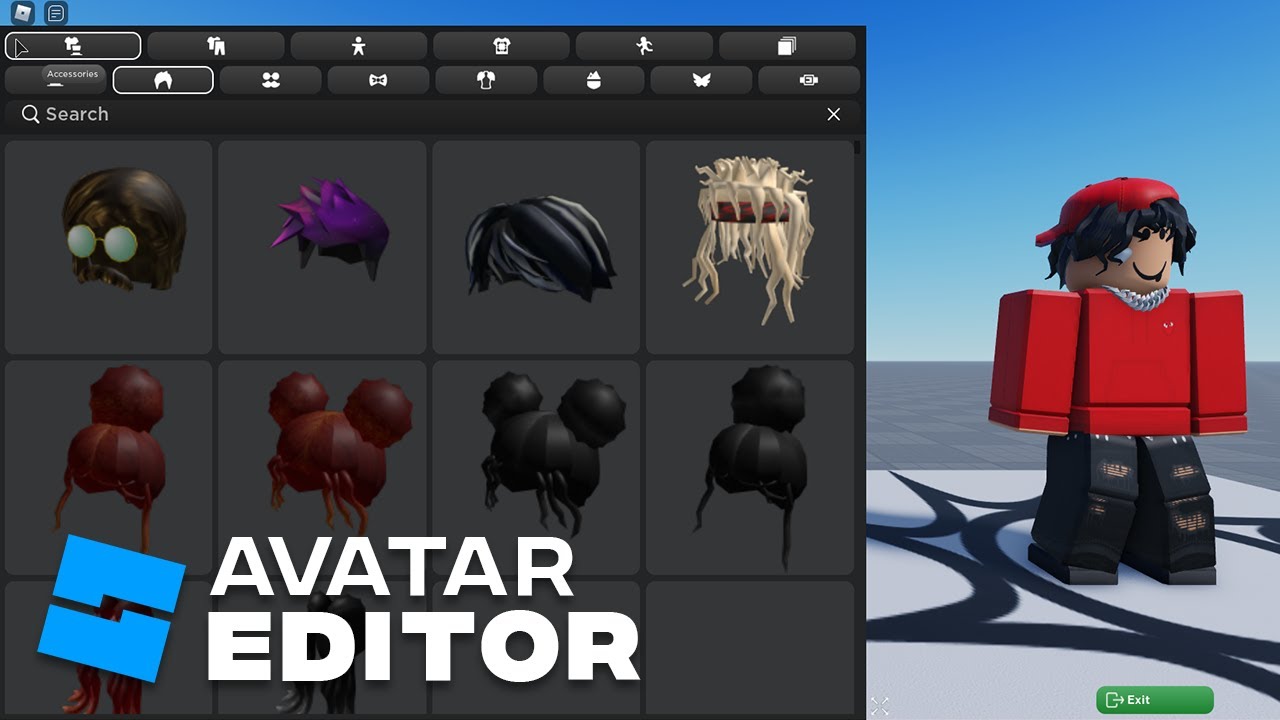
Q: How do I attach accessories or custom items to an imported avatar in Studio?
A: To attach accessories to an imported avatar, place the accessory model (e.g., a hat, weapon) into the avatar's character model in the Explorer window. Then, use an 'Attachment' or 'Weld' constraint, specifically a 'WeldConstraint', to secure the accessory to the correct body part (e.g., Head, RightArm) of the avatar, ensuring it moves with the character.
Q: Is it possible to make an imported avatar a playable character for testing scripts?
A: Yes, you can make an imported avatar playable for script testing. Insert the avatar, ensure it has a Humanoid and HumanoidRootPart. Then, in the 'Test' tab, you can use the 'Play' or 'Play Here' options. Roblox Studio will typically use your game's default character, but you can configure scripts to swap to a specific loaded avatar for advanced testing scenarios.
Hey there, fellow creators and gamers! Ever found yourself deep into a new Roblox Studio project, trying to perfect an animation or test a new outfit, only to realize you need a proper character model in your workspace? You are not alone. In the fast-paced world of gaming, especially for the 87% of US gamers who regularly dive into virtual worlds for relaxation, social connection, or skill-building, efficiency is key. We all juggle work, family, and life, and when it comes to game development, we want solutions that are straightforward and effective. Understanding how to insert avatar into Roblox Studio is a fundamental skill that unlocks a world of possibilities for testing, customization, and making your game truly engaging. This guide is designed to cut through the jargon and give you the practical steps you need to get avatars into your game, helping you optimize your limited development time.
Roblox remains a powerhouse of user-generated content, with millions of players spending an average of 10+ hours per week across various platforms, including mobile, which continues its dominance. Personalizing experiences, even in the development phase, is crucial for creating content that resonates. Whether you are building a new social hub or a competitive obstacle course, bringing a character into your studio allows for realistic testing and design. Let us dive into the most efficient ways to achieve this, making sure you are always ahead of the curve, crafting experiences that are not just fun but also technically sound.
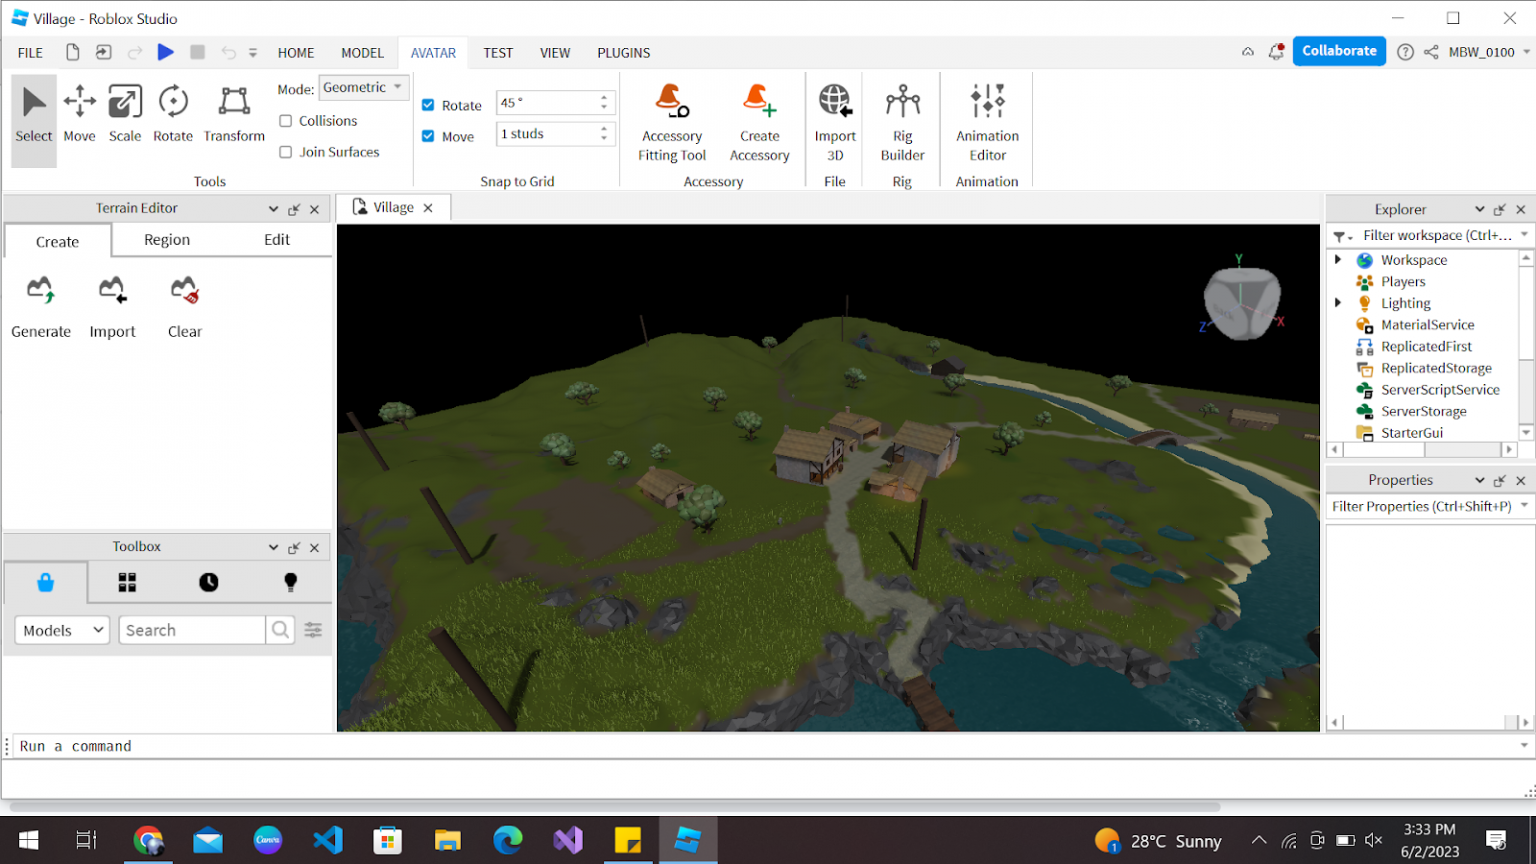
How to Insert Avatar Into Roblox Studio Using the Built-in Tools?
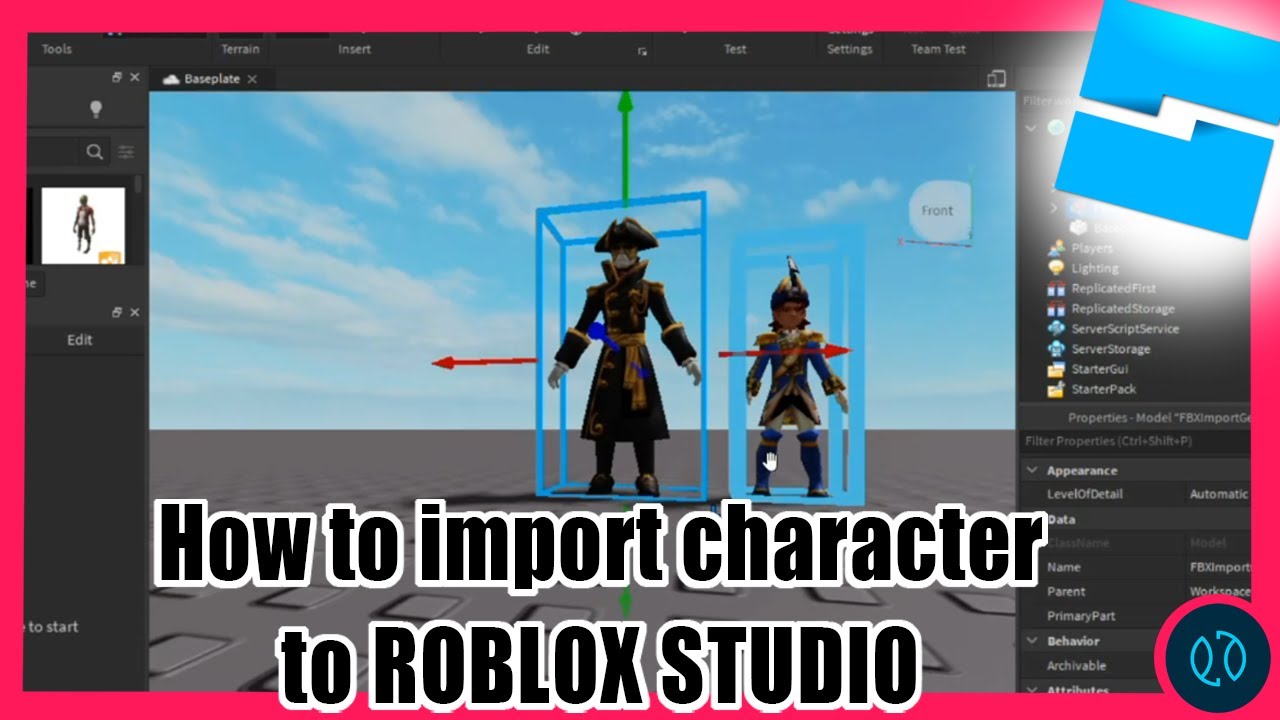
Inserting an avatar into Roblox Studio is thankfully much simpler than it used to be, thanks to several built-in tools. The most common method involves using the Avatar Importer or the Test tab. To get started, open your project in Roblox Studio. Navigate to the Home tab and locate the "Play" section. You will see options like "Play," "Play Here," and "Run." While these are for testing your game with your own avatar, to simply insert an avatar as a model, you will use a different approach for more control. The most direct method is through the Avatar section within the "View" or "Test" tabs, which allows you to spawn a character for testing. This is critical for assessing how different character types, like R6 or R15, interact with your environment and scripts, a common concern for developers balancing visual fidelity and performance.
For a specific avatar, you will want to utilize the "Avatar Importer" feature. This tool, often found under the "Plugins" tab or sometimes within the "Home" or "Model" tabs depending on your Studio version, allows you to import character models directly. Simply search for the player's username or User ID. This feature is particularly useful for collaborating with friends or testing specific avatar configurations without needing to publish and play the game. It saves valuable time, allowing you to iterate on designs much faster, which is a huge benefit for busy creators.
What are the Different Methods to Add a Player Character to My Studio Project?
There are a few reliable methods to add a player character to your Roblox Studio project, each serving a slightly different purpose. Beyond the built-in Avatar Importer, many developers leverage third-party plugins from the Roblox Marketplace. These plugins often offer enhanced features, such as importing multiple avatars at once, saving common avatars, or even integrating advanced rigging options. Search for terms like "Load Character Pro" or "Character Loader" in the Plugins section of the Toolbox. These tools streamline the process, which is essential when you have limited time and want to focus on the creative aspects of your game.
Another method, more technical but highly flexible, involves scripting. You can write a script that instantiates a player's character model based on their User ID. This is particularly useful for dynamic spawning, creating custom character selection systems, or when you need to load a specific character for cutscenes. This method requires a basic understanding of Lua scripting and the `Players:GetCharacterAppearanceAsync()` function. While it takes a bit more effort upfront, it offers unparalleled control and is a staple for advanced developers looking to push the boundaries of their Roblox creations.
Why is it Important to Insert Avatars for Game Testing and Development?
Inserting avatars for game testing and development is absolutely crucial for creating a polished and engaging experience. Think of it this way: how can you ensure your new obstacle course is fair if you do not test it with a character of varying sizes and proportions? How can you animate a new weapon if you do not have a model to rig it to? Avatars provide a realistic representation of how players will interact with your game world. This includes testing collision detection, verifying animation playback, checking hitboxes for combat systems, and ensuring that UI elements are visible and accessible around a character model.
Furthermore, given that social gaming is a significant trend, allowing players to customize and see their unique avatars in-game is a huge draw. Testing different avatar types (R6 vs. R15) ensures your game is compatible with the diverse range of character preferences players have. Many developers find that spending time on thorough avatar-based testing early on prevents major headaches and rework later, ultimately leading to a more stable and enjoyable game for the end-user. It is about delivering value and a smooth experience, which busy gamers appreciate.
How Do I Load My Own Avatar into Roblox Studio for Personal Use?
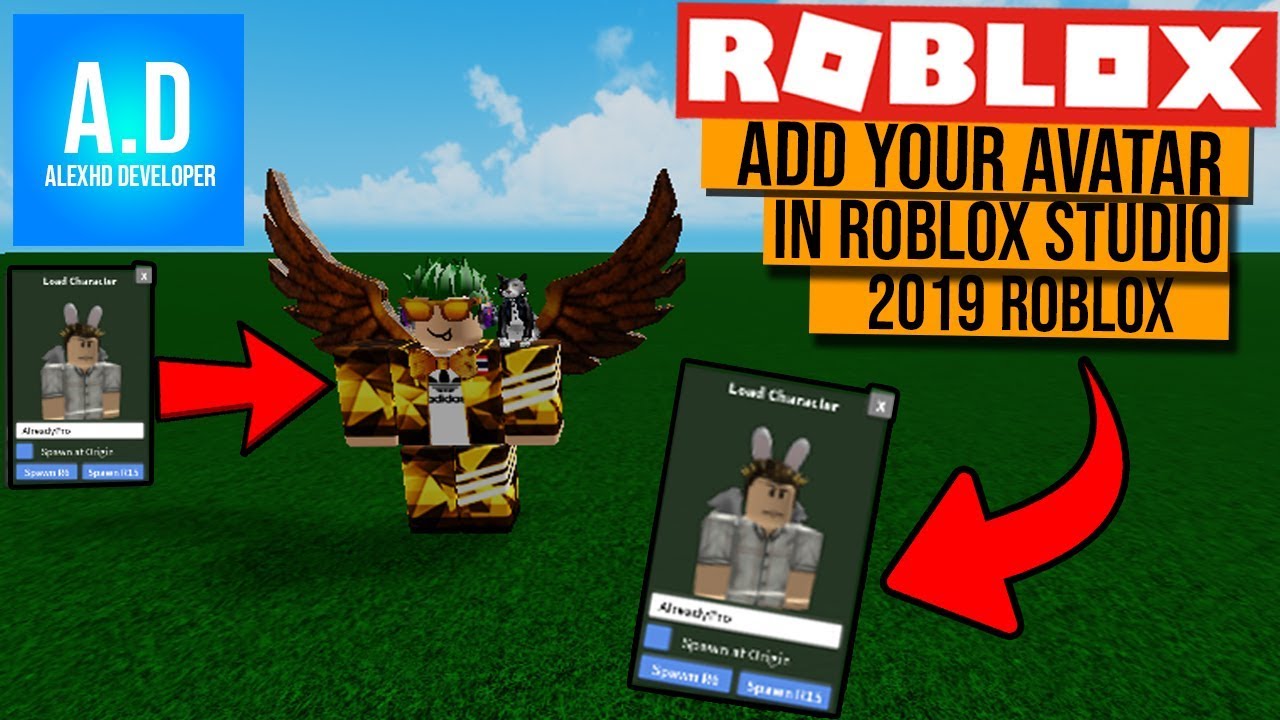
Loading your own avatar into Roblox Studio for personal use is a straightforward process and perfect for testing out your latest outfit combos or animations. The easiest way is to use your own username or User ID with the built-in Avatar Importer. Open Roblox Studio, then go to the "Plugins" tab and click on the "Load Character" or a similar plugin you might have installed. If you do not have one, you can often find a basic "Load Character" tool directly under the "Home" or "Test" tabs. Enter your Roblox username, choose whether you want an R6 or R15 model, and click "Spawn."
Your avatar will then appear in your workspace. This allows you to inspect its structure, test attachments, and see how your character appears in various lighting conditions within your game environment. It is a fantastic way to preview custom accessories or body parts you are developing. For those who frequently switch between different avatars, saving your character as a model in the workspace can also be a time-saver, allowing you to quickly re-insert it without typing your name each time. This personal touch ensures your creations look good on your own avatar too.
What is the Difference Between R6 and R15 Avatars in Roblox Studio?
Understanding the difference between R6 and R15 avatars is fundamental when working in Roblox Studio, especially when considering how to insert avatar into Roblox Studio. R6 avatars are the classic Roblox character models, consisting of 6 body parts: Torso, Head, Left Arm, Right Arm, Left Leg, and Right Leg. They have a more blocky, traditional appearance and are often favored for their simplicity, which can lead to better performance in complex games. Many older games or games prioritizing a retro aesthetic still use R6 models.
R15 avatars, on the other hand, are more modern, consisting of 15 body parts. These include additional segments for the limbs (e.g., Upper Arm, Lower Arm, Hand) allowing for smoother, more natural animations and more detailed customization options. R15 models are crucial for games that utilize advanced animations, emotes, and realistic character movement. While they offer greater visual fidelity, they can sometimes be more performance-intensive due to the increased number of joints and parts. Most new Roblox games and experiences default to R15 to take advantage of its flexibility and visual appeal, aligning with current gaming trends for more immersive experiences.
How to Troubleshoot Common Avatar Insertion Problems in Roblox Studio?
Encountering issues when trying to insert avatar into Roblox Studio is common, but most problems have straightforward solutions. If an avatar fails to load, first double-check the username or User ID you entered. A simple typo is often the culprit. Ensure your internet connection is stable, as Studio needs to fetch the avatar data from Roblox servers. Sometimes, restarting Roblox Studio can resolve temporary glitches. Like any software, a fresh start often clears up lingering issues.
Another common problem is avatars appearing invisible or partially loaded. This might indicate an issue with the avatar's assets or a Studio bug. Try loading a different, generic avatar to see if the problem persists. If the issue is specific to one avatar, it might have corrupted assets or be an outdated model. For complex issues, check the Output window in Studio (View > Output) for any error messages, which can provide clues. Finally, ensure your Studio is up-to-date. Roblox frequently releases updates that fix bugs and improve stability. Staying current ensures you have the latest tools and fixes at your disposal, preventing unnecessary frustration for busy developers.
Can I Use Custom Character Models Instead of Standard Roblox Avatars?
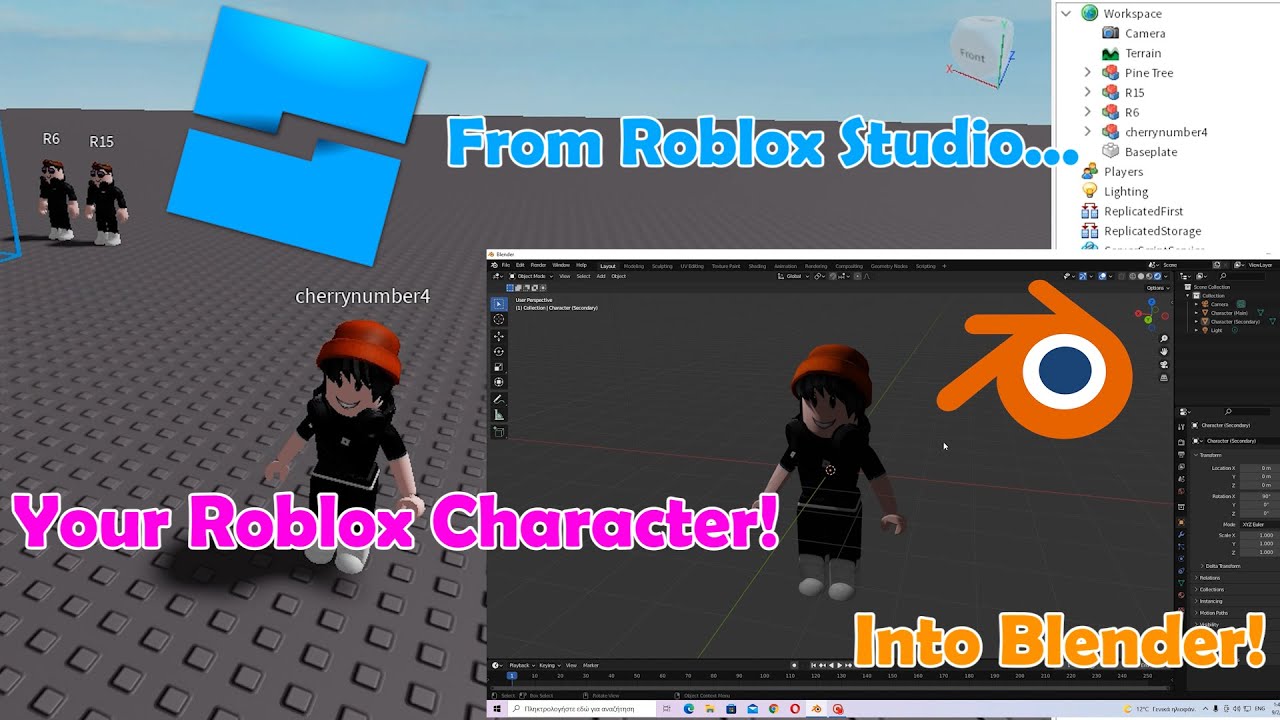
Absolutely! Using custom character models instead of standard Roblox avatars is a fantastic way to make your game truly unique and stand out. While standard avatars are great for testing, custom models allow for complete artistic control, fitting perfectly with your game's theme and style. Many popular Roblox games feature completely bespoke characters, which can significantly enhance immersion and player engagement. The process usually involves creating your character model in an external 3D software like Blender, then importing it into Roblox Studio as a `.fbx` or `.obj` file.
Once imported, you will need to rig your custom model (attach it to a humanoid rig with bones/joints) and create a Humanoid object within the model. This allows Roblox to recognize it as a character that can be animated and controlled by a player. This process can be intricate but offers immense creative freedom. Many tutorials are available on the Roblox Developer Hub and YouTube, demonstrating how to rig custom characters. While it requires a bit more technical know-how, the payoff in terms of unique game identity is immense, appealing to gamers who appreciate innovative and polished experiences.
What are the Best Practices for Managing Avatars in My Roblox Studio Project?
Effective avatar management in Roblox Studio can save you a lot of headaches and keep your projects organized. First, always save frequently used avatars or custom character models as assets in your workspace or as `.rbxm` files. This allows for quick re-insertion without having to go through the loading process every time. Group similar avatars or character test models into folders within the Explorer window (e.g., "R6 Test Avatars," "R15 Player Models"). This keeps your workspace clean and easy to navigate.
Secondly, consider using a consistent naming convention for your avatar models. Something like "PlayerAvatar_Username_R15" makes it easy to identify them at a glance. When testing, make sure to remove unnecessary avatar models from your workspace once you are done, as too many complex models can impact Studio's performance, especially on older hardware. Finally, always test your game with both R6 and R15 characters to ensure compatibility across the board. This proactive approach helps maintain performance and broadens your game's appeal, which is vital in today's diverse gaming landscape where mobile and cross-play are dominant.
Conclusion
Mastering how to insert avatar into Roblox Studio is an invaluable skill for any developer, from hobbyists to seasoned creators. It underpins effective testing, enhances character customization, and ultimately contributes to a more polished and enjoyable game experience for everyone, especially for the busy US gamers who seek quality and efficiency in their entertainment. By using the built-in tools, exploring useful plugins, and understanding the nuances of R6 and R15 models, you are well-equipped to bring your creative visions to life. Remember, attention to detail in character integration can significantly elevate your game's appeal and performance.
What is your biggest gaming challenge when developing in Roblox Studio? Comment below! We love hearing from fellow creators and finding solutions together.
FAQ Section
What is the quickest way to get my own avatar into Roblox Studio?
The quickest way is to use a character loading plugin from the Toolbox or the built-in Avatar Importer. Search for your username, select R6 or R15, and click spawn. Your character will appear instantly, ready for testing and design adjustments in your workspace.
Can I save an imported avatar for later use in Roblox Studio?
Yes, you can. After inserting an avatar, drag it from the workspace into the Explorer window, right-click it, and select "Save to File..." to save it as an `.rbxm` model. You can also save it as a model to your Roblox inventory via "Save to Roblox" for use in other projects or sharing with friends.
How do I test animations on an imported avatar in Roblox Studio?
To test animations, ensure your imported avatar has a HumanoidRootPart and a Humanoid object. Use the Animation Editor (Plugins tab) and select the avatar model. You can then create or load animations and play them directly on the character model within Studio, verifying how they look and function.
What if my imported avatar appears without clothes or accessories?
If your avatar loads without clothes or accessories, it usually means the asset loading failed or there's a privacy setting issue on the account. Check your internet connection. Also, some plugins might have issues loading complex outfits. Try a simpler avatar, or manually add accessories from the Toolbox if available.
Is it better to use R6 or R15 avatars for performance in Roblox Studio?
Generally, R6 avatars tend to offer slightly better performance due to having fewer body parts and joints. For games where performance is critical, especially on lower-end devices or for large player counts, R6 can be advantageous. However, R15 allows for much richer animations and customization, which most modern games prioritize. It is a trade-off between detail and performance.
Can I insert avatars of other players into my Roblox Studio game?
Yes, you can. As long as you have their Roblox username or User ID, you can use the Avatar Importer or a character loading plugin to insert any public player's avatar into your Studio workspace. This is incredibly useful for testing multiplayer interactions or character scaling with diverse player models.
Inserting avatars into Roblox Studio for game development and testing, using Avatar Importer and plugins for easy integration, understanding character model types R6 and R15, troubleshooting common avatar insertion issues, enhancing game testing and custom character creation with correct avatar implementation.
35


How To Put Your Roblox Avatar Into Roblox Studio YouTube . How To Add People Roblox Easily Your 2026 Guide . How To Make R6 Avatar In Roblox Studio Easy Guide 2026 YouTube . HOW TO PUT YOUR ROBLOX AVATAR INTO ROBLOX STUDIO YouTube . How To Add Your Avatar Into Your Roblox Game YouTube


How To Import Custom Avatar In Roblox Studio 2022 Guide How To Import Custom Avatar In Roblox Studio 3 980x547 . How To Add Your Character In Roblox Studio Tech How 5 Spawn In Character. How To Add AVATAR Items Into ROBLOX Studio YouTube Hqdefault . How To Import Your Avatar Into ROBLOX Studio Best Plugins YouTube . How To Make Avatar Editor GUI In Roblox Studio ROBLOX STUDIO TUTORIAL


How To Add Someone S Avatar In Roblox Studio 2 Easy Ways V4 460px Add Someones Avatar In Roblox Studio Step 12 . How To Import Custom Avatar In Roblox Studio 2022 Guide How To Import Custom Avatar In Roblox Studio 2 980x794 . How To Add YOUR Roblox Avatar To A Game In Roblox Studio YouTube . How To Insert A Hat Into Roblox Studio At Lucas Cade Blog . How To Add Someone S Avatar In Roblox Studio 2 Easy Ways V4 460px Add Someones Avatar In Roblox Studio Step 4

How To Add Someone S Avatar In Roblox Studio 2 Easy Ways V4 460px Add Someones Avatar In Roblox Studio Step 6 . How To Insert And Customize Your Roblox Avatar In Roblox Studio . How To Insert A Hat Into Roblox Studio At Lucas Cade Blog Add Character Roblox . How To Insert A Hat Into Roblox Studio At Lucas Cade Blog . How To Add Your Avatar In Roblox Studio YouTube

How To Add Your Avatar To Roblox Studio YouTube . How To Add Someone S Avatar In Roblox Studio 2 Easy Ways V4 460px Add Someones Avatar In Roblox Studio Step 13 . How To Add Someone S Avatar In Roblox Studio 2 Easy Ways V4 460px Add Someones Avatar In Roblox Studio Step 5 . How To Add Someone S Avatar In Roblox Studio 2 Easy Ways V4 460px Add Someones Avatar In Roblox Studio Step 1 . Roblox Avatar To Blender Your Easy Guide


How To Add People Roblox Easily Your 2026 Guide . How To Add Avatar Items Into Roblox Studio TechBloat SL160 . How To Add Someone S Avatar In Roblox Studio 2 Easy Ways V4 460px Add Someones Avatar In Roblox Studio Step 2 . How To Add Someone S Avatar In Roblox Studio 2 Easy Ways V4 460px Add Someones Avatar In Roblox Studio Step 7 . How To Add Avatar Items Into Roblox Studio TechBloat SL160


How To Add Avatar IN YOUR Roblox Studio YouTube . How To Make A AVATAR EDITOR In Roblox Studio Tutorial Updated 2023 . How To Import Custom Avatar In Roblox Studio 2022 Guide How To Import Custom Avatar In Roblox Studio 1280x722 . How To Change Your Avatar On Roblox Step By Step YouTube . How To Create A Roblox Avatar Codingal IMage 14 3 1536x864